Customize Your Chat Widget
Personalize your chat widget to match your brand. Configure its appearance, logo, welcome message, and display preferences before publishing it to your website.
Overview
The Widget Customization page lets you control how your chat widget looks and behaves. Any changes you make are reflected immediately in the live preview, allowing you to review your configuration before saving.
Customize Widget Settings
Choose Widget Theme Color
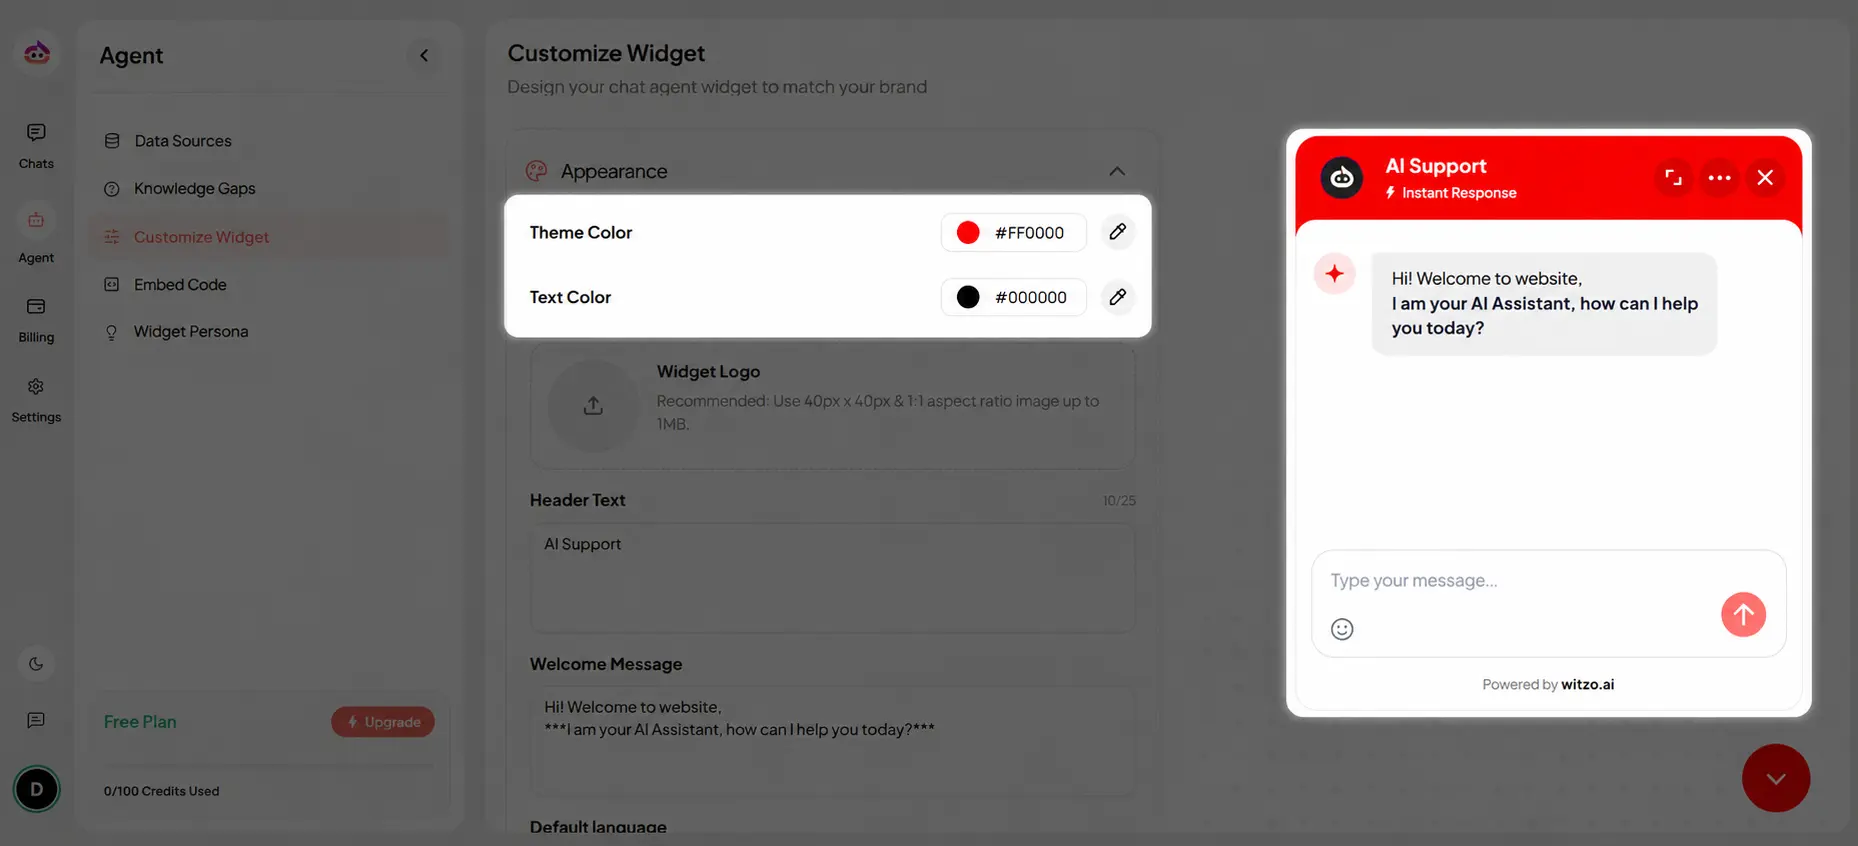
Customize your widget's Theme color to match your brand identity.
- Navigate to Dashboard → Widget Customization.
- Locate the Theme Color setting.
- Choose your preferred color using the color picker.
Set the Assistant Name
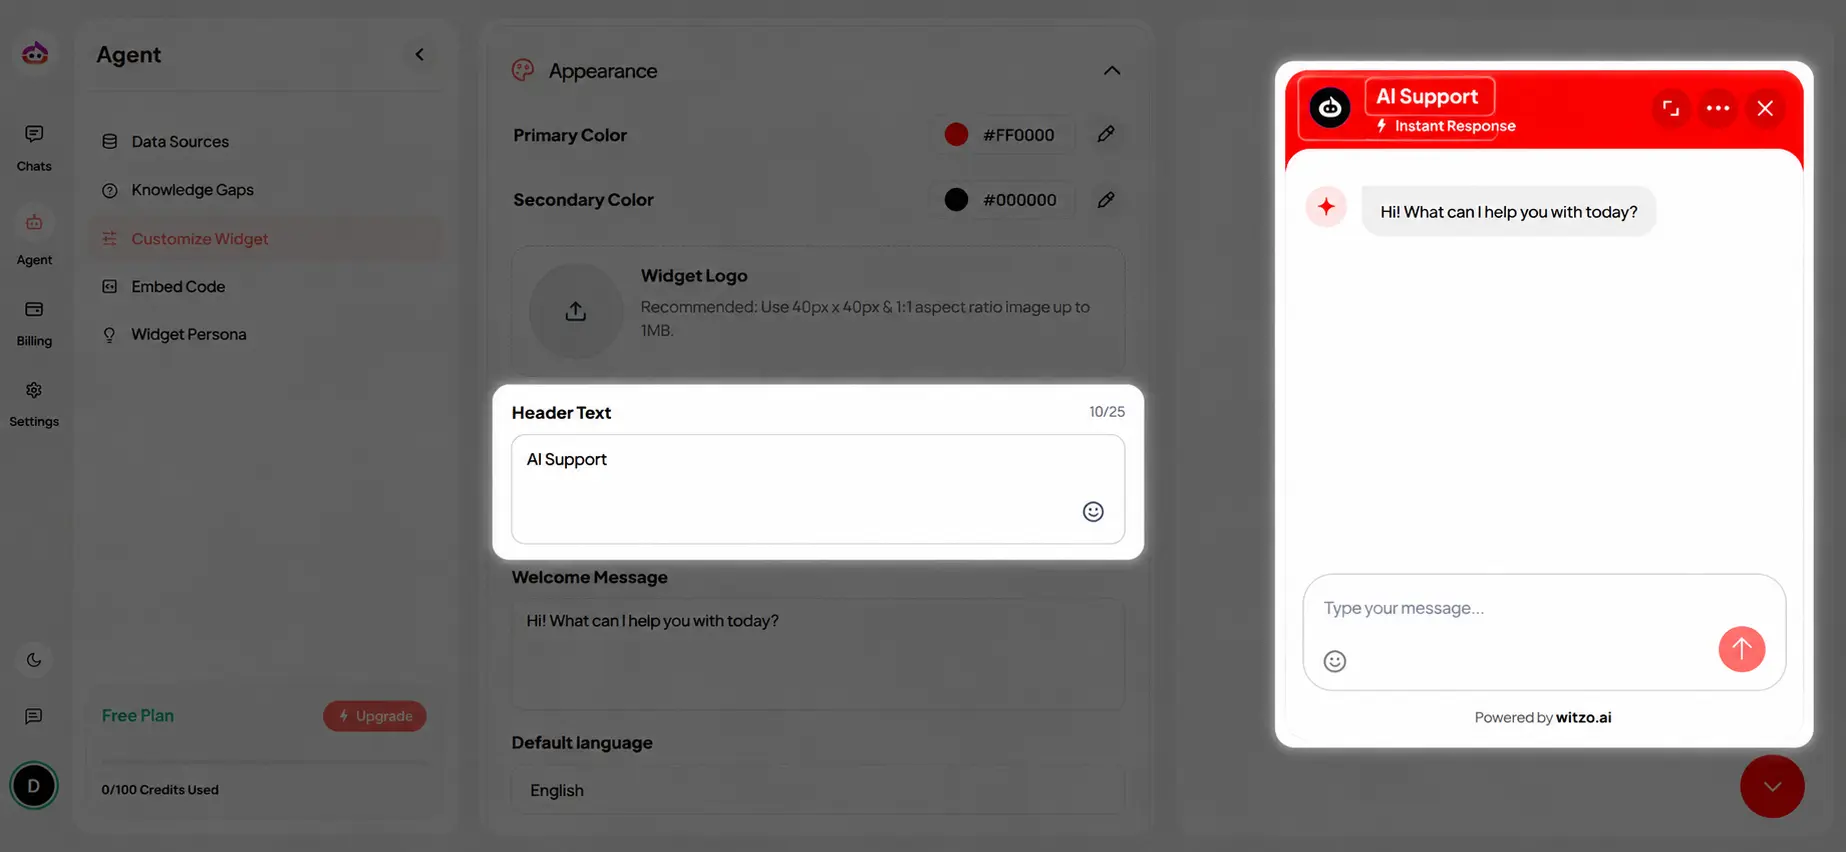
Choose the name displayed at the top of your chat widget.
- Open Dashboard → Widget Customization.
- Locate the Widget Name field.
- Enter the name you want your visitors to see.
Upload a Widget Logo
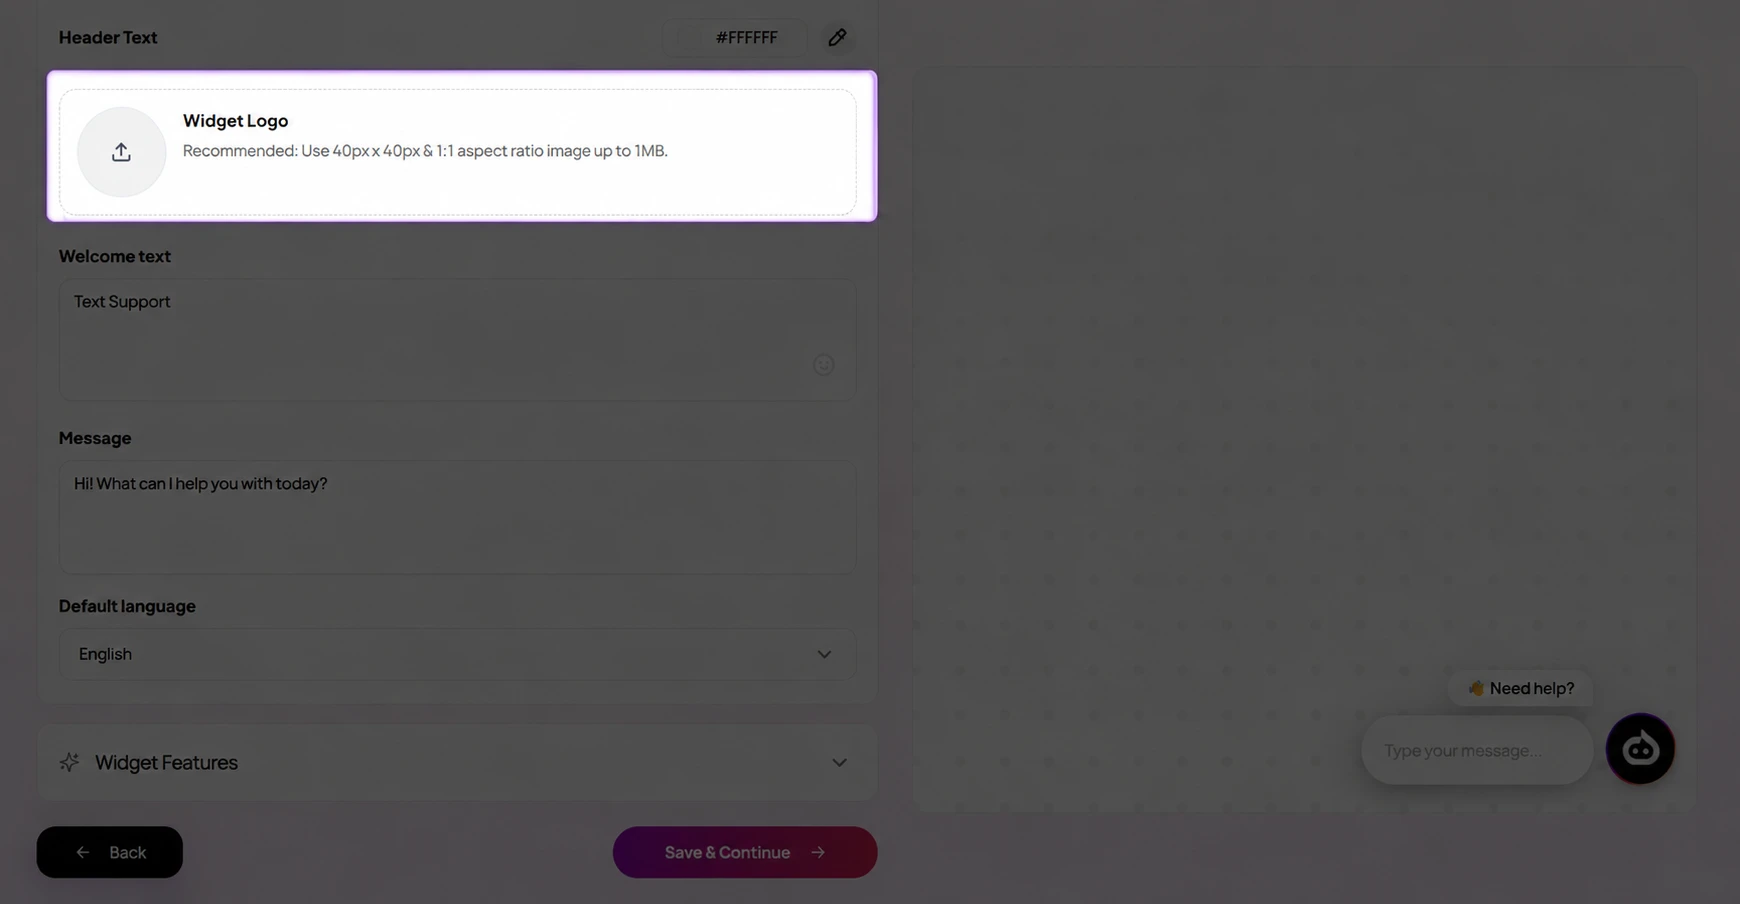
Personalize your widget by adding your company or brand logo.
- Open Dashboard → Widget Customization.
- Locate the Widget Logo section.
- Upload an image.
- Recommended image size: 40 × 40 px
- Use a 1:1 aspect ratio.
- Maximum file size: 1 MB.
- Animated GIF logos are supported.
Customize the Welcome Message
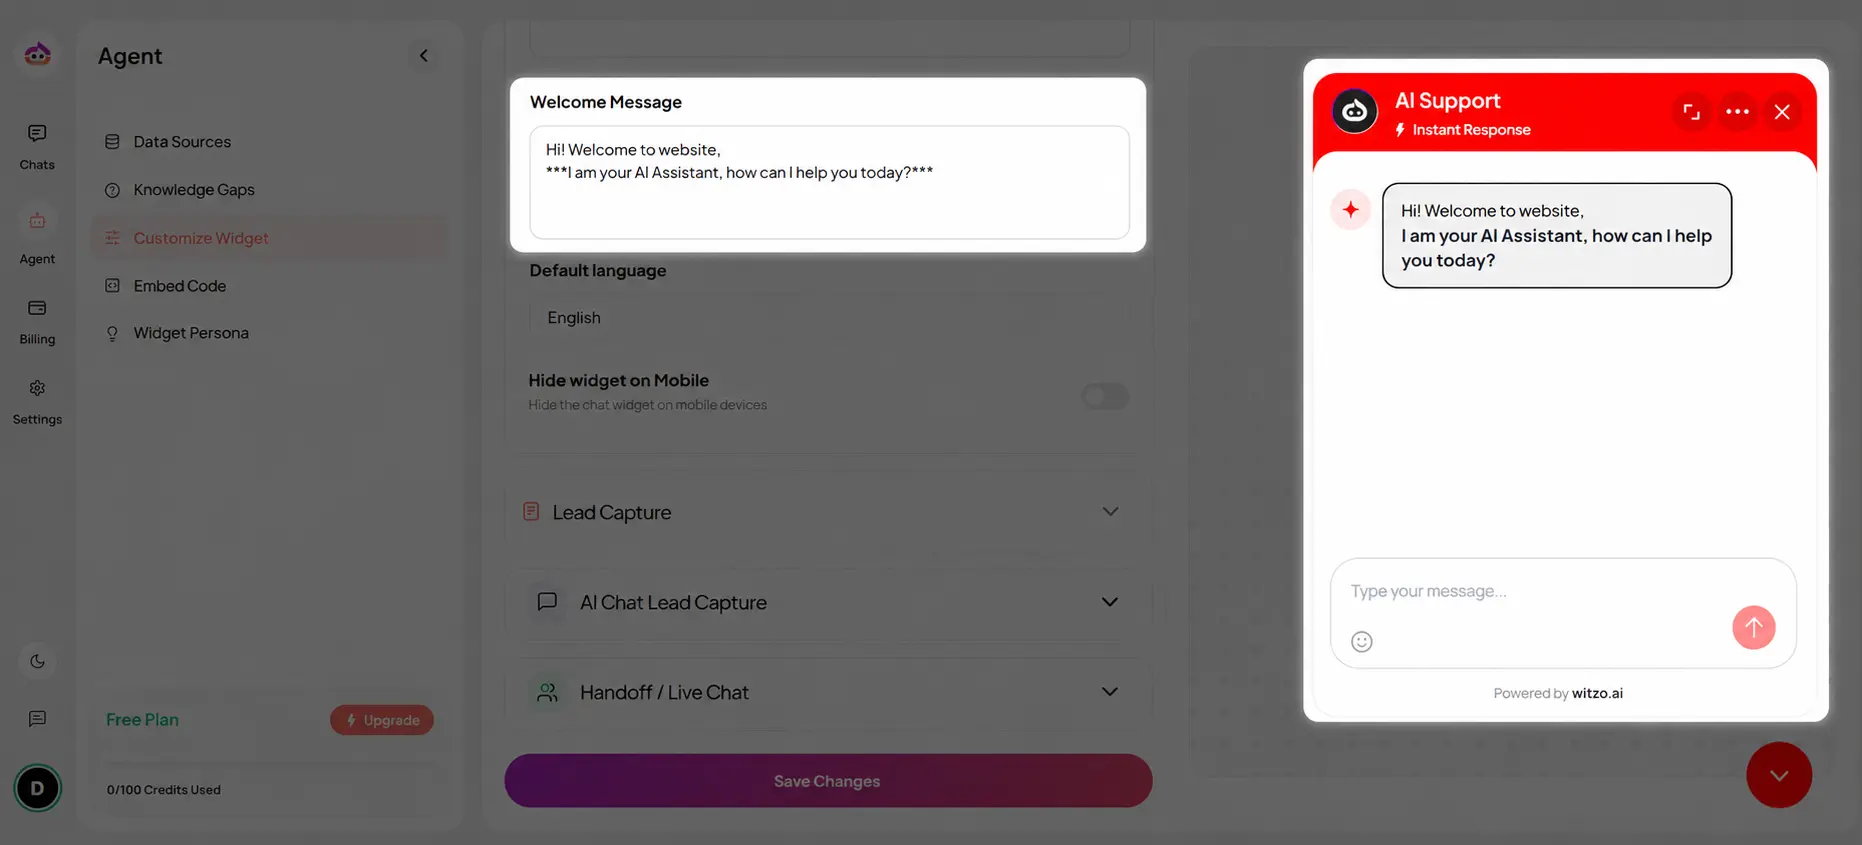
Create a friendly greeting that welcomes visitors when they open your chat widget.
- Open Dashboard → Widget Customization.
- Locate the Welcome Message field.
- Enter your preferred greeting.
Tip: Keep your welcome message short, clear, and inviting.
Example messages
- 👋 Hi! How can I help you today?
- Welcome! Feel free to ask me anything.
- Hello! I'm here to answer your questions.
- Need assistance? Start a conversation with me.
Show or Hide the Widget on Mobile
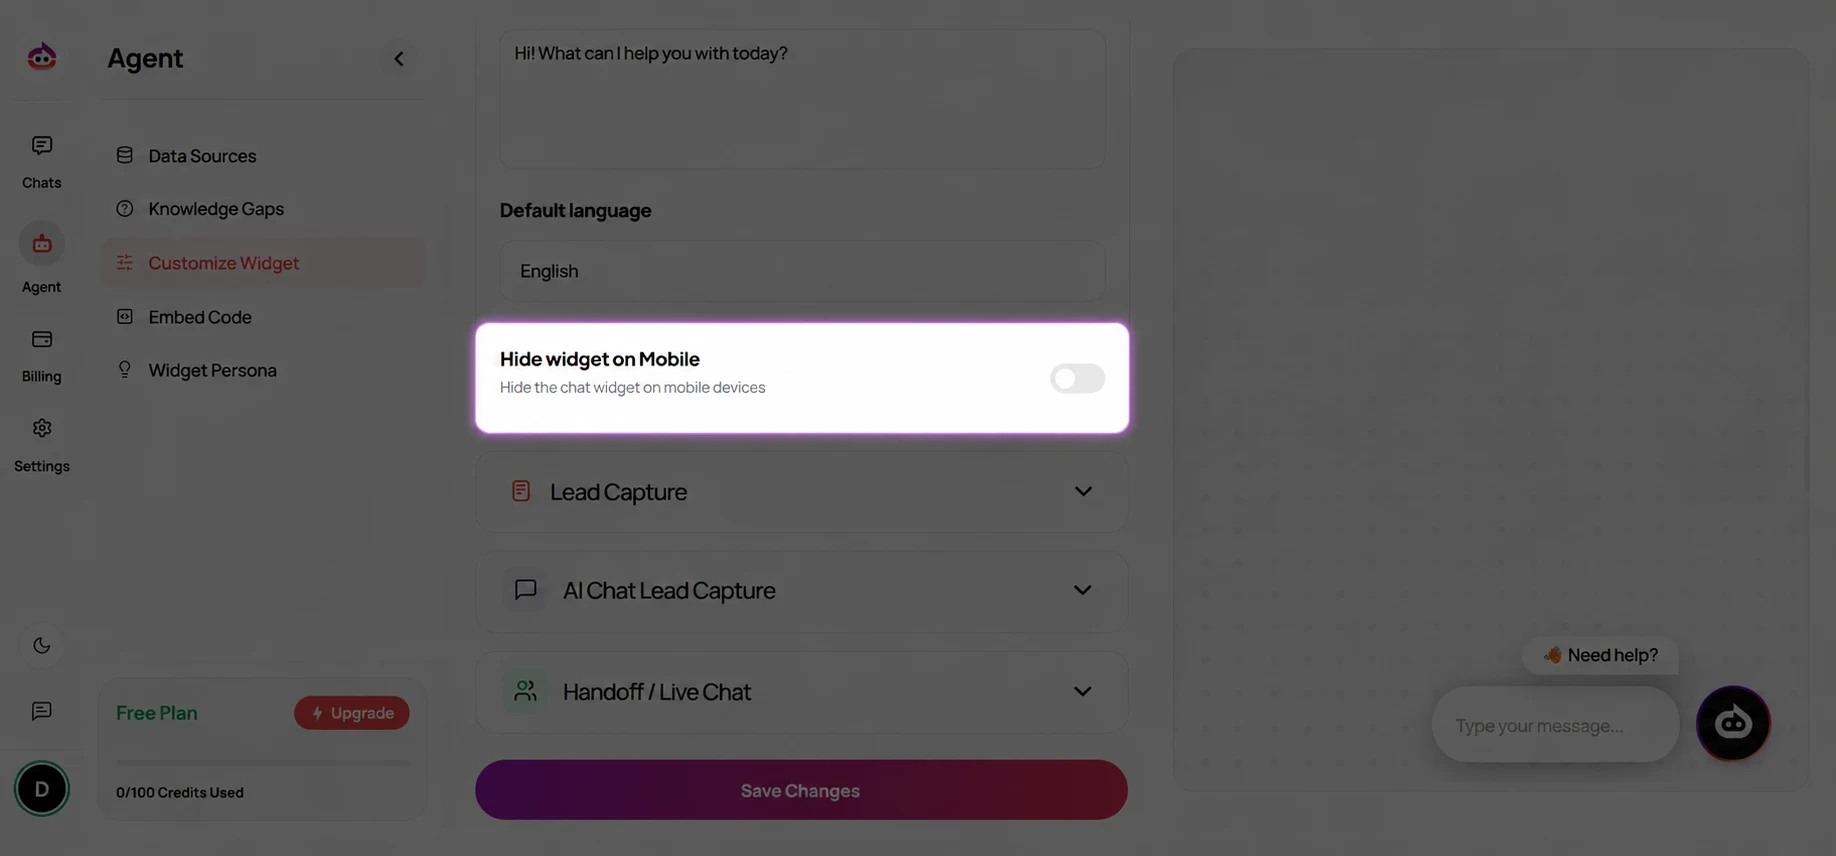
Control whether your chat widget is visible on mobile devices using the Hide Widget on Mobile switch.
- Open Dashboard → Widget Customization.
- Locate the Hide Widget on Mobile option.
- Toggle the switch according to your preference:
- Enabled - The widget is hidden on mobile devices.
- Disabled - The widget remains visible on mobile devices.
- Click Save Changes.
The updated visibility setting is applied immediately after saving.
This setting only affects mobile devices. The widget will continue to appear on desktop browsers unless you change its visibility separately.
Adjust Widget Position on Mobile
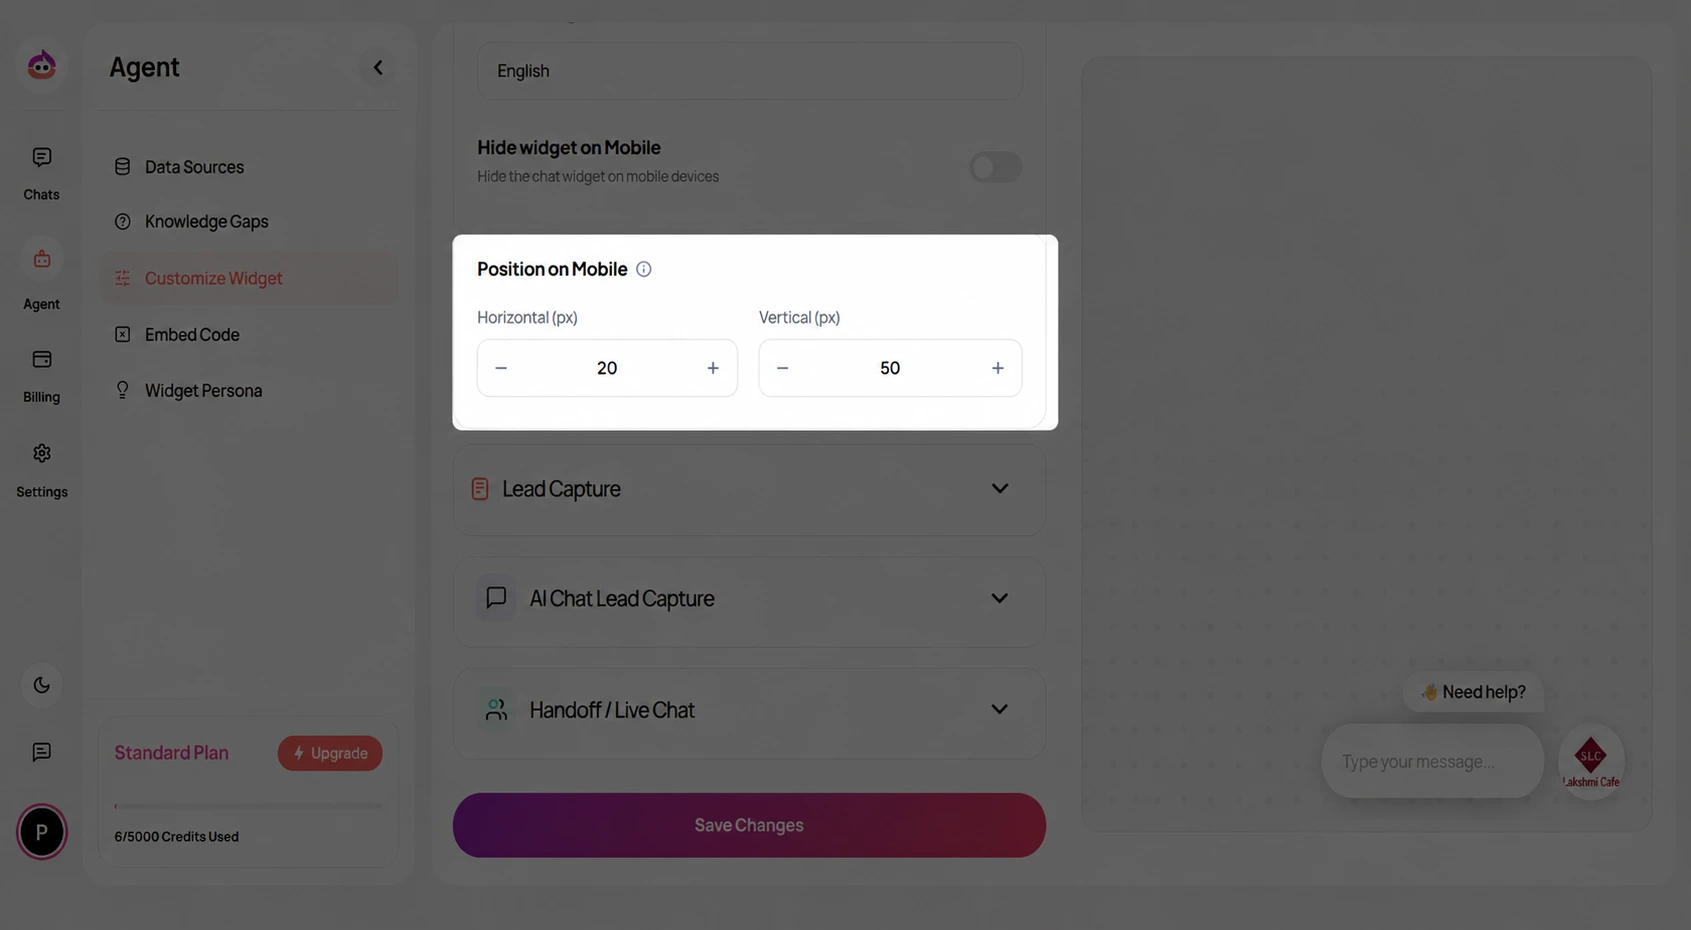
Control where the chat widget appears on mobile devices by adjusting its horizontal and vertical position.
- Open Dashboard → Widget Customization.
- Locate the Position on Mobile section.
- Adjust the following values as needed:
- Horizontal (px) – Moves the widget left or right.
- Vertical (px) – Moves the widget up or down.
- Use the + and − buttons to fine-tune the position.
- Click Save Changes.
The widget position is updated immediately after saving.
- Position values are measured in pixels (px).
- Changes only apply to mobile devices and do not affect the widget position on desktop.
- Use the preview panel to ensure the widget doesn't overlap important content on your website.